In my 15 years in the security industry, I’ve seen technology evolve at a breathtaking pace. But few innovations have been as practical and empowering for homeowners and businesses as the solar powered outdoor security camera. Gone are the days of restrictive wiring and rising electricity bills. Today, harnessing the power of the sun offers a flexible, sustainable, and highly effective way to keep an eye on what matters most.
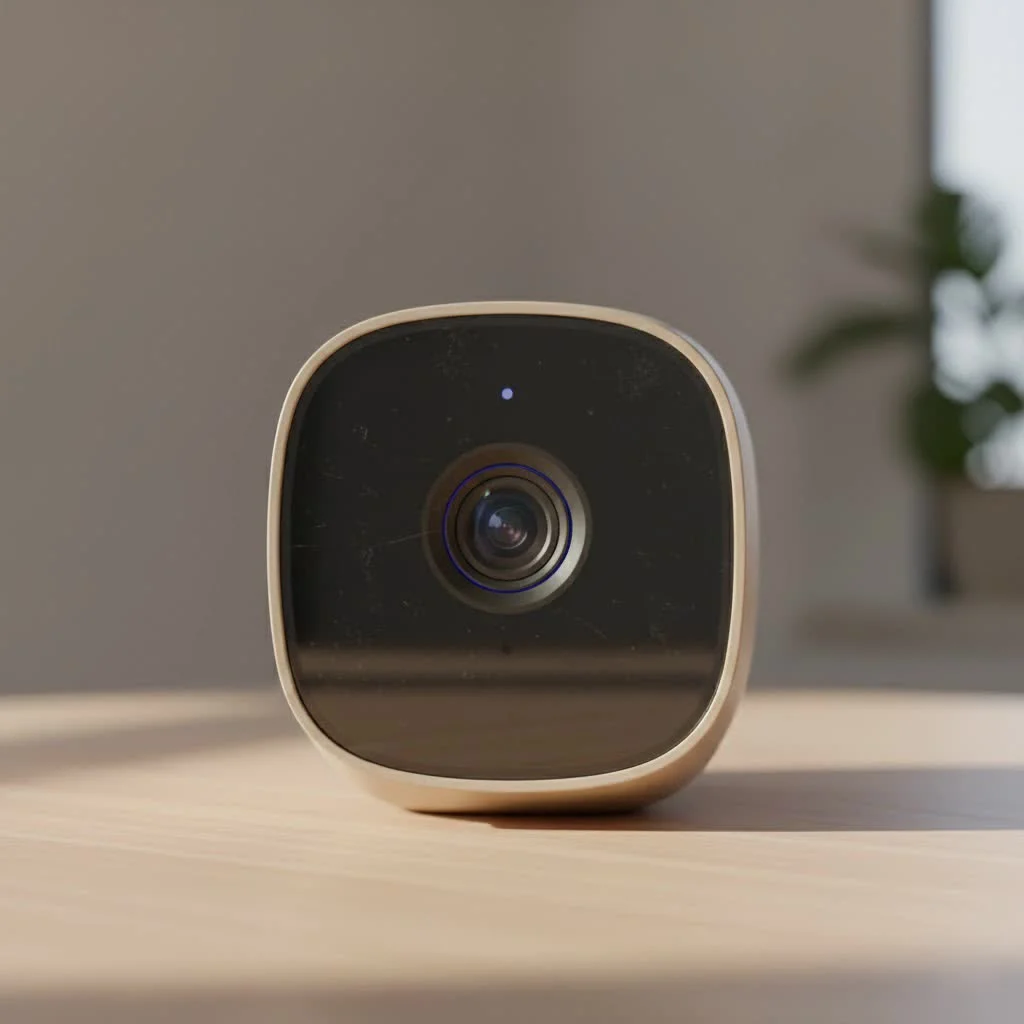
This guide is your one-stop resource, drawing on years of hands-on experience to help you choose, install, and maintain the perfect solar security camera for your needs. We’ll cut through the technical jargon and focus on what truly delivers peace of mind. For explore our home reviews on this site.
How Do Solar Powered Security Cameras Actually Work?
The concept is brilliantly simple yet highly effective. A solar powered outdoor security camera is a self-sufficient system that operates by converting sunlight into electrical energy. It’s not magic, but a seamless interaction between a few key components.
- The Solar Panel: This is the engine of the system. Composed of photovoltaic cells, the panel’s job is to capture sunlight and convert it into direct current (DC) electricity.
- The Rechargeable Battery: This is the heart. The DC electricity generated by the panel flows into a built-in rechargeable battery, storing the power. This ensures the camera keeps running through the night, on cloudy days, or during power outages.
- The Camera Unit: This is the eye. The stored battery power runs the camera itself, including its lens, motion sensors, night vision LEDs, and the Wi-Fi or cellular module that transmits the footage to you.
During daylight hours, the solar panel simultaneously powers the camera and tops up the battery. When the sun goes down, the camera automatically switches to battery power, providing uninterrupted 24/7 surveillance.
Key Features to Look For in a Solar Security Camera
Navigating the market can be daunting. From my experience, these are the non-negotiable features you should prioritize to ensure you get a reliable and effective camera.
Video Resolution
Clarity is king in security footage. Vague, pixelated images are useless for identifying faces or license plates.
- 1080p (Full HD): This is the baseline standard for clear, usable footage.
- 2K or 4K (Ultra HD): These offer superior detail and clarity, allowing you to zoom in on distant objects without significant quality loss. For covering large areas like a long driveway or a backyard, the higher resolution is worth the investment.
Night Vision
|
Our Picks for the Best Security Camera in 2026
As an Amazon Associate I earn from qualifying purchases.
|
||
| Num | Product | Action |
|---|---|---|
| 1 | WYZE Cam v4 (Latest Model), 2.5K AI Security Camera, Indoor/Outdoor Cameras for Home Security, Baby Monitor & Pet Camera, Vibrant Color Night Vision, No Subscription Required, Free Expert Help |

|
| 2 | REOLINK 4K PoE Security Camera System Wired, 8pcs 8MP PoE Cameras, Smart Person/Vehicle Detection, 16CH NVR with 4TB HDD, H.265, 24/7 Recording, High Bitrate & Clear Stream, RLK16-800D8 |
|
| 3 | Security Cameras Wireless Outdoor,2K Indoor WiFi Wireless Cameras,Outside Battery Powered Camera for Home Security,AI Motion Detection,Color Night Vision,Spotlight,Siren Alarm,SD/Cloud Storage,2 Pack |
|
| 4 | TP-Link Tapo 1080P Indoor Security Camera for Baby Monitor, Dog Camera w/Motion Detection, 2-Way Audio Siren, Night Vision, Cloud & SD Card Storage, Works w/Alexa & Google Home (Tapo C100) |
|
| 5 | Tapo TP-Link 2K Pan/Tilt Indoor Security Camera for Baby Monitor, Pet Camera, Motion Detection & Tracking, 2-Way Audio, Cloud & SD Card Storage, Works w/Alexa & Google Home, Black, C211(2-Pack) |
|
| 6 | WYZE Bulb Cam Security Camera, 2K HD Outdoor Light Bulb Camera, Color Night Vision, Dimmable LED Bulb, Motion Detection, Siren Alarm, Works w/Alexa/Google Assistant. Free Expert Support |
|
| 7 | Kasa Smart Indoor Pan-Tilt Home Security Camera, 1080p HD Dog Camera w/Night Vision, Motion Detection for Baby & Pet Monitor, Cloud & SD Card Storage, Works w/ Alexa & Google Home, 2.4G WiFi (EC71) |
|
| 8 | Tapo 2K Pan/Tilt Security Camera for Baby Monitor, Dog Camera w/Motion Detection, 2-Way Audio Siren, Night Vision, Cloud&SD Card Storage, Works w/Alexa & Google Assistant, 2-Pack (Tapo C210P2) |
|
| 9 | WYZE Cam Pan v3 Indoor/Outdoor IP65-Rated 1080p Pan/Tilt/Zoom Wi-Fi Smart Home Security Camera with Color Night Vision, 2-Way Audio, Compatible with Alexa & Google Assistant, White, 2-Pack |
|
| 10 | Security Cameras Wireless Outdoor-Solar&Battery Powered 2K 2.4G Cameras for Home Security, Instant Alert, AI Human Detection, Color Night Vision, 2-Way Talk, SD Storage, Work with Alexa, Z1 4P |
|
Criminal activity often happens under the cover of darkness. Your camera must be able to see clearly when the lights are out.
- Infrared (IR) Night Vision: This is the standard black-and-white night vision. It uses IR LEDs to illuminate the area, which is invisible to the human eye but clear to the camera.
- Color Night Vision: A more advanced feature that uses ambient light or a small, built-in spotlight to record in full color at night. This can provide crucial details, like the color of a car or clothing.
Weather Resistance (IP Rating)
An outdoor camera must withstand the elements. The IP (Ingress Protection) rating tells you exactly how durable it is.
- IP65: Protected against dust and low-pressure water jets. Good for sheltered locations.
- IP66 or IP67: Offers higher protection against dust and powerful water jets or even temporary immersion. This is the standard you should aim for to ensure longevity in exposed environments.
Motion Detection and Alerts
To conserve battery and avoid sifting through hours of empty footage, intelligent motion detection is crucial. Modern cameras use advanced algorithms to differentiate between people, vehicles, and animals, reducing false alarms from swaying trees or passing shadows. When significant motion is detected, the camera should instantly send a notification to your smartphone.
Storage Options
How your camera stores recorded video is a critical consideration.
- Local Storage: Typically via a microSD card inserted into the camera. This is a one-time cost and keeps your footage private, but it can be stolen if the camera is tampered with.
- Cloud Storage: Your footage is uploaded to a secure server. This is safe from theft and accessible from anywhere, but usually requires a monthly subscription fee.
Expert Insight from David Chen, Security Systems Integrator:
“I always advise my clients to opt for a camera that offers both local and cloud storage. This hybrid approach provides the best of both worlds: the immediate access and privacy of local storage, with the secure, off-site backup of the cloud.”
Step-by-Step Installation Guide
One of the greatest advantages of a solar powered outdoor security camera is its ease of installation. No electricians or complex wiring required.
- Charge the Camera Fully: Before you mount anything, use the included USB cable to fully charge the camera’s battery indoors. This ensures it starts with a full power reserve.
- Find the Perfect Spot: This is the most critical step. You need a location that offers both an optimal viewing angle of your target area (e.g., front door, driveway) and receives at least 4-6 hours of direct sunlight per day for the solar panel.
- Mount the Camera: Most kits come with a mounting bracket and screws. A good rule of thumb is to install the camera about 8-10 feet off the ground. This is high enough to provide a wide view and deter tampering, but low enough for easy maintenance.
- Mount the Solar Panel: Attach the solar panel nearby, ensuring it’s angled to catch maximum sunlight. Many kits come with a long cable, so the panel doesn’t have to be right next to the camera. Adjust its angle for the best sun exposure.
- Connect and Configure: Plug the solar panel’s cable into the camera’s weatherproof port. Then, follow the manufacturer’s app instructions to connect the camera to your Wi-Fi network. This usually involves scanning a QR code and takes just a few minutes.
- Test Your View: Use the app’s live view to check the camera’s angle and motion detection zones. Adjust as needed to eliminate blind spots and minimize false alerts from public sidewalks or roads.
Maintaining Your Solar Powered Camera
While largely self-sufficient, a little maintenance goes a long way in ensuring your camera performs optimally for years to come.
- Clean the Solar Panel: Every few months, wipe the solar panel with a soft, damp cloth to remove any dust, pollen, or bird droppings. A clean panel is an efficient panel.
- Check the Lens: Gently clean the camera lens with a microfiber cloth to ensure your footage remains crystal clear.
- Inspect Mountings: Periodically check that the camera and solar panel mounts are secure and haven’t been loosened by wind or weather.
- Monitor Battery Performance: Through the app, keep an eye on the battery level. If you notice it’s consistently low, your solar panel may be obstructed by new tree growth or not getting enough direct sunlight.
Frequently Asked Questions (FAQ)
Do solar powered security cameras work on cloudy days?
Yes. The built-in battery stores excess power generated on sunny days. A fully charged, high-quality camera can typically run for several days to a week with little to no sun, ensuring it works through rainy or overcast periods.
Do these cameras work at night?
Absolutely. They use the energy stored in the battery during the day to power their functions at night, including advanced infrared or color night vision features for clear footage in complete darkness.
How much sunlight does a solar panel need?
Most manufacturers recommend a minimum of 4-6 hours of direct sunlight per day for the panel to keep the camera’s battery sufficiently charged for 24/7 operation.
Do I need Wi-Fi for a solar powered camera?
Most solar powered cameras use Wi-Fi to transmit video and alerts. However, for areas without Wi-Fi coverage, such as remote properties, farms, or construction sites, you can find 4G cellular models that operate using a SIM card and a mobile data plan.
How long do the batteries last before needing replacement?
The high-quality lithium-ion batteries in most modern solar cameras are designed to last for several years. Their lifespan depends on usage, climate, and charge cycles, but you can typically expect 3-5 years of reliable performance before a replacement might be needed.
Your Partner in Security
Choosing a solar powered outdoor security camera is a smart, forward-thinking investment in your property’s safety. It offers unparalleled flexibility, reduces your carbon footprint, and provides reliable surveillance without ongoing energy costs. By focusing on the key features outlined here and following proper installation and maintenance, you can build a robust security shield powered by the sun. At Ydmrw, we are committed to empowering you with the knowledge to protect what’s yours effectively and confidently.
Get our weekly buyer guide
Practical specs, not advice. Unsubscribe anytime.
I’ve been looking into outdoor cameras for a while, but the idea of dealing with wiring always put me off. The information here about how solar cameras convert sunlight to power really clarified things for me. I appreciate the focus on practical advice. My only minor gripe is that the night vision on the model I chose isn’t quite as crisp as I’d hoped, but it’s still perfectly functional for my needs.
I was really struggling with finding a good security solution for my detached garage, as running power out there was going to be a nightmare. This guide on solar powered cameras was a lifesaver! I ended up getting a Reolink Argus 3 Pro, and it’s been fantastic. The setup was super easy, and I haven’t had to worry about charging it once. It’s truly a self-sufficient system.
As someone who’s not super techy, I really appreciated how this guide cut through the technical jargon. It made understanding the benefits of solar security cameras so much easier. I now have a camera watching my front porch, and the peace of mind knowing it’s always recording without me having to mess with wires is priceless. Highly recommend for anyone wanting a flexible security option.
I bought a solar camera based on the general principles discussed here, hoping to avoid high electricity bills. While it does save on power, I’ve found that during extended cloudy periods, the battery struggles to keep up, and I get notifications about low power. I wish there was more emphasis on battery capacity recommendations for areas with less consistent sun. It’s still a good concept, but something to be aware of.