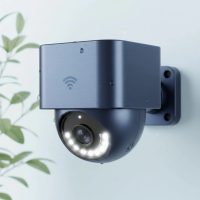
Ever wished you could keep an eye on your home or business, no matter where you are? Imagine receiving an alert on your phone the moment a package arrives, or checking in on your furry friends while on vacation. That’s the power of a remote security camera system. These intelligent guardians offer unparalleled peace of mind, allowing you to monitor your property from virtually anywhere, at any time.
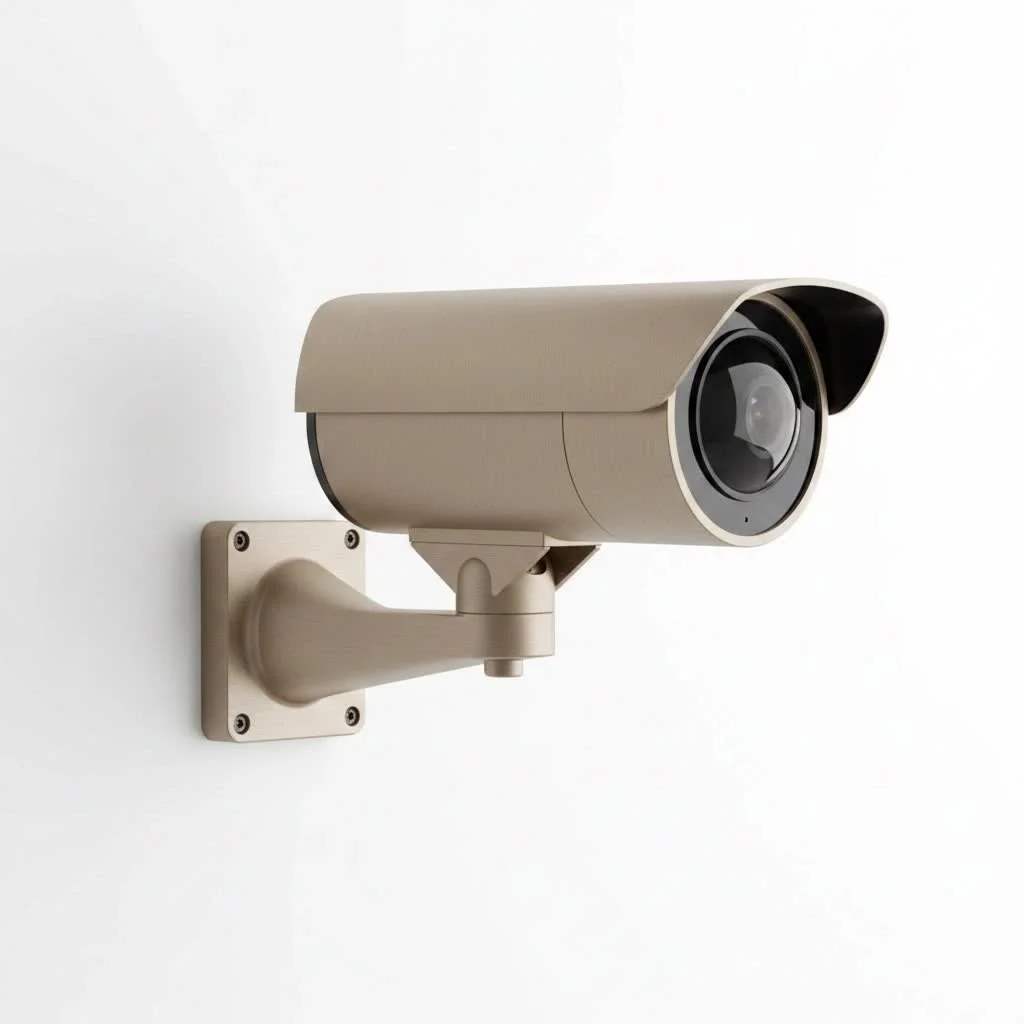
In today’s fast-paced world, security isn’t just about locks and alarms; it’s about staying connected and informed. Remote security cameras have revolutionized how we protect what matters most, transforming complex surveillance into an intuitive, user-friendly experience. Whether you’re a seasoned tech enthusiast or new to the world of smart home devices, understanding these systems is key to leveraging their full potential. This comprehensive guide will walk you through everything you need to know, from how these cameras work to choosing the right one, setting it up, and troubleshooting any bumps along the way.
How Remote Security Cameras Work Their Magic
At its core, a remote security camera is a surveillance device that allows you to view live video feeds and recorded footage from a distance, typically through a connected smartphone, tablet, or computer. But how does this digital sorcery happen? It all boils down to robust network connectivity and clever data transmission.
The Fundamentals of Remote Monitoring
Remote video monitoring works by installing cameras equipped with network connectivity at desired locations. These cameras capture video footage and transmit it over networks—be it your local Wi-Fi, a cellular connection, or a wired Ethernet link—to a central monitoring station, a cloud-based server, or directly to your mobile device. This means you can conveniently view surveillance footage using various gadgets, eliminating the need for constant on-site presence.
Every device connected to the internet, including your security camera, has an Internet Protocol (IP) address, much like a telephone number, that routes requests and replies to the correct destination. For remote access from outside your local network, your router uses a public IP address. Since these can change periodically, a Dynamic DNS (DDNS) service is often employed to provide a consistent domain name, allowing you to reliably access your system even if your public IP shifts. Additionally, “port forwarding” is a crucial step, instructing your router to allow specific traffic through its firewall and direct it to your camera or network video recorder (NVR).
Wi-Fi Wonders: Connecting to Your Home Network
|
Our Picks for the Best Security Camera in 2026
As an Amazon Associate I earn from qualifying purchases.
|
||
| Num | Product | Action |
|---|---|---|
| 1 | Security Cameras Wireless Outdoor,2K Indoor WiFi Wireless Cameras,Outside Battery Powered Camera for Home Security,AI Motion Detection,Color Night Vision,Spotlight,Siren Alarm,SD/Cloud Storage,2 Pack |

|
| 2 | WYZE Bulb Cam Security Camera, 2K HD Outdoor Light Bulb Camera, Color Night Vision, Dimmable LED Bulb, Motion Detection, Siren Alarm, Works w/Alexa/Google Assistant. Free Expert Support |
|
| 3 | Tapo TP-Link 2K Pan/Tilt Indoor Security Camera for Baby Monitor, Pet Camera, Motion Detection & Tracking, 2-Way Audio, Cloud & SD Card Storage, Works w/Alexa & Google Home, Black, C211(2-Pack) |
|
| 4 | TP-Link Tapo 1080P Indoor Security Camera for Baby Monitor, Dog Camera w/Motion Detection, 2-Way Audio Siren, Night Vision, Cloud & SD Card Storage, Works w/Alexa & Google Home (Tapo C100) |
|
| 5 | Tapo 2K Pan/Tilt Security Camera for Baby Monitor, Dog Camera w/Motion Detection, 2-Way Audio Siren, Night Vision, Cloud&SD Card Storage, Works w/Alexa & Google Assistant, 2-Pack (Tapo C210P2) |
|
| 6 | Kasa Smart Indoor Pan-Tilt Home Security Camera, 1080p HD Dog Camera w/Night Vision, Motion Detection for Baby & Pet Monitor, Cloud & SD Card Storage, Works w/ Alexa & Google Home, 2.4G WiFi (EC71) |
|
| 7 | REOLINK 4K PoE Security Camera System Wired, 8pcs 8MP PoE Cameras, Smart Person/Vehicle Detection, 16CH NVR with 4TB HDD, H.265, 24/7 Recording, High Bitrate & Clear Stream, RLK16-800D8 |
|
| 8 | Security Cameras Wireless Outdoor-Solar&Battery Powered 2K 2.4G Cameras for Home Security, Instant Alert, AI Human Detection, Color Night Vision, 2-Way Talk, SD Storage, Work with Alexa, Z1 4P |
|
| 9 | WYZE Cam v4 (Latest Model), 2.5K AI Security Camera, Indoor/Outdoor Cameras for Home Security, Baby Monitor & Pet Camera, Vibrant Color Night Vision, No Subscription Required, Free Expert Help |
|
| 10 | WYZE Cam Pan v3 Indoor/Outdoor IP65-Rated 1080p Pan/Tilt/Zoom Wi-Fi Smart Home Security Camera with Color Night Vision, 2-Way Audio, Compatible with Alexa & Google Assistant, White, 2-Pack |
|
The most common type of remote security camera leverages your existing home Wi-Fi network. These cameras transmit video and audio signals via radio waves (Wi-Fi signals) to a receiver, such as an NVR/DVR, a computer, or an app on your smart device. They typically broadcast over 2.4GHz or 5GHz frequencies, offering flexibility in placement without the hassle of extensive wiring. While Wi-Fi cameras are incredibly convenient for installation, they do require a stable Wi-Fi signal and a power source, either through a power cable or batteries.
Cellular Savvy: Security Beyond Wi-Fi Range
What if you need surveillance where Wi-Fi isn’t available, like a remote cabin, construction site, or boat? That’s where cellular security cameras come into play. These innovative devices use 3G or 4G cellular networks to transmit video, similar to how your smartphone connects to the internet. They come with an integrated SIM card that links to nearby cell towers, enabling them to be positioned virtually anywhere with cellular service. The main difference? Cellular cameras usually require a paid monthly service plan based on data usage, but they offer unmatched flexibility for truly remote locations.
The Brains Behind the Operation: Image Sensors, Processors, and Storage
When light hits a camera’s lens, it’s focused onto an image sensor, which captures the video like a digital camera. This sensor converts photons into electrons to create images. The camera’s onboard chipset then processes these images, encoding the video into a compressed digital format (like H.264 or H.265) to save bandwidth and storage space while maintaining quality. This sophisticated processing also handles advanced features such as motion sensing, facial recognition, and enhancing night vision capabilities. The processed video is then transmitted and can be stored locally on a network video recorder (NVR), a digital video recorder (DVR), a memory card, or remotely in a cloud-based server, depending on your system’s configuration.
Choosing Your Watchful Eye: Types and Key Features to Consider
Selecting the ideal remote security camera involves more than just picking a brand. It’s about matching features to your specific security needs and environment.
Wired vs. Wireless vs. Cellular: What’s Right for You?
When it comes to connectivity, you generally have three main options:
- Wireless (Wi-Fi) Cameras: These are popular for their ease of installation and flexible placement, connecting to your existing Wi-Fi network. They’re great for most homes and businesses where Wi-Fi is readily available.
- Wired Cameras (IP/Analog): While requiring more involved installation for cabling, wired cameras offer a highly reliable and stable connection, often preferred for larger, more critical installations. Many IP cameras still offer remote viewing capabilities.
- Cellular Cameras: The go-to solution for locations without Wi-Fi or power access, providing security anywhere with cellular service. Remember the ongoing data plan cost.
“The best camera choice hinges on your specific location and how much flexibility you need. For most urban homes, Wi-Fi is perfect, but for that lakeside cottage, cellular is a game-changer,” advises security expert Marcus Reed.
Crystal Clear Vision: Understanding Resolution (1080p, 2K, 4K)
The resolution determines the clarity and detail of your video footage.
- 1080p (Full HD): Offers clear video, suitable for general surveillance.
- 2K (Quad HD): Provides more detail than 1080p, useful for zooming in on specifics.
- 4K (Ultra HD): Delivers exceptional detail, making it easier to identify faces and license plates, even when zoomed. Higher resolution often means larger file sizes and potentially more bandwidth usage.
Seeing in the Dark: Night Vision Technologies
Security needs don’t stop when the sun goes down. Most remote security cameras come equipped with night vision:
- Infrared (IR) Night Vision: Uses invisible IR light to illuminate an area, producing black and white footage in low light.
- Color Night Vision: Some advanced cameras can capture color footage in low light conditions, often with the help of ambient light or built-in spotlights, providing more contextual detail.
Beyond Basic Motion: Smart Detection and AI
Modern remote security cameras go beyond simple motion detection. Advanced systems incorporate:
- AI Detection: Can differentiate between people, vehicles, and animals, reducing false alarms.
- Activity Zones: Allows you to define specific areas for motion detection, ignoring irrelevant movement.
- Intelligent Alerts: Sends notifications only for what truly matters, ensuring you’re not overwhelmed with unnecessary pings.
Talk Back: Two-Way Audio and Other Essentials
Consider these additional features for a truly robust system:
- Two-Way Audio: Allows you to listen in and speak through the camera, great for deterring intruders or communicating with visitors.
- Pan, Tilt, Zoom (PTZ): Provides mechanical control over the camera’s viewing angle from your app, offering a wider coverage area.
- Weatherproofing (IP Ratings): Crucial for outdoor cameras to withstand rain, dust, and extreme temperatures.
- Privacy Zones: Allows you to block out specific areas in the camera’s field of view for privacy.
Storing Your Footage: Local vs. Cloud Options
Where your video footage is stored is a critical consideration:
- Local Storage: Footage is saved on a physical device like an NVR, DVR, or a microSD card within the camera itself. This offers control over your data and often avoids monthly fees.
- Cloud Storage: Footage is uploaded and stored on secure remote servers. This provides off-site backup, protecting your recordings even if the camera is damaged or stolen. Many cloud services come with subscription fees for varying storage durations.
Setting Up Your Remote Security Camera System: A Step-by-Step Approach
Installing a remote security camera system might seem daunting, but by following a structured approach, you can have your watchful eyes online in no time. Remember, patience and planning are your best allies!
Phase 1: Strategic Planning for Optimal Coverage
Before you even unbox your camera, a little foresight goes a long way.
- Assess Your Needs: Walk around your property, both indoors and out. Identify key areas you want to monitor, such as main entrances, driveways, backyards, valuable indoor spaces, or blind spots. Consider what specific events you want to capture (e.g., package deliveries, suspicious activity, pet monitoring).
- Choose Camera Types: Based on your assessment, decide whether you need indoor, outdoor, Wi-Fi, or cellular cameras. For outdoor cameras, ensure they have appropriate weatherproofing.
- Map Out Placement: For each camera, consider its field of view, potential obstructions, and optimal height. For outdoor cameras, mounting them 8-10 feet high can prevent tampering while still capturing crucial details like faces. Ensure the chosen spots have strong Wi-Fi or cellular signal strength.
- Power Considerations: Plan how each camera will receive power. Battery-powered cameras offer flexibility, while wired cameras provide continuous power. For wired cameras, identify nearby power outlets or plan for Power over Ethernet (PoE) if your system supports it.
Phase 2: The Digital Dance – Connecting to Your Network
This phase focuses on getting your camera connected digitally before you physically mount it. This strategy makes troubleshooting connectivity issues much easier.
- Unbox and Power Up: Carefully unbox your camera and connect it to a temporary power source near your router.
- Download the App: Install the manufacturer’s official companion app on your smartphone or tablet. This app is your control center.
- Create an Account: Follow the in-app instructions to create a user account and register your device.
- Connect to Wi-Fi/Cellular: Most modern cameras use a simple process, often involving scanning a QR code with the camera itself or entering your Wi-Fi credentials into the app. For cellular cameras, ensure the SIM card is correctly installed and activated with a data plan.
- Initial Test Run: Once connected, check the live feed through the app. Verify connection strength and video quality. If you experience issues, it’s easier to troubleshoot them now while the camera is accessible at ground level.
- Configure Essential Settings: Adjust initial settings like motion detection sensitivity, notification preferences, and video quality within the app.
Phase 3: Physical Placement and Powering Up
With your camera digitally configured, it’s time to make it a permanent fixture.
- Mount the Camera: Use the provided mounting brackets and screws to securely attach the camera to your chosen wall or ceiling. For battery-powered cameras, ensure the mount is robust, as these can be surprisingly weighty.
- Connect Power (if applicable): If it’s a wired camera, run the power cable to the nearest outlet or connect your PoE cable to the appropriate switch. For solar-powered models, ensure the solar panel is positioned to receive ample sunlight.
- Final Adjustments: Access the live feed on your app and fine-tune the camera’s angle for optimal coverage.
- NVR/DVR Connection (for systems with local storage): If you’re using an NVR or DVR, connect it to your network router via an Ethernet cable. Log in to its interface (usually via a web browser or dedicated software), configure settings, and ensure it’s recognizing and recording from all your cameras. Many NVRs offer an “Auto Add” feature for connected cameras.
Keeping Your Remote Security Camera System Running Smoothly: Maintenance & Troubleshooting
Even the most advanced remote security camera systems can occasionally run into hiccups. Knowing how to maintain your system and troubleshoot common issues will save you time and frustration.
Common Headaches: What Can Go Wrong?
Here are some typical problems you might encounter with a remote security camera:
- Camera Offline: The most frustrating issue, preventing remote viewing and recording.
- No Video/Poor Video Quality: You see a black screen, choppy footage, blurry images, or incorrect colors.
- Night Vision Failure: Infrared LEDs aren’t lighting up, or the camera isn’t switching to night mode.
- Connectivity Issues: The camera struggles to connect to Wi-Fi or cellular networks, or you can’t access it remotely.
- False Alarms: Constant notifications due to irrelevant motion detection.
- No Recording: Footage isn’t being saved locally or to the cloud.
Quick Fixes: Your First Line of Defense
When an issue arises, start with these simple steps:
- Confirm All Connections: Ensure all power cables are snug in their outlets and at the camera. For Wi-Fi cameras, check your router’s status. For wired IP cameras, verify the Ethernet cable is securely plugged into both the camera and the PoE switch/router.
- Inspect All Cables: Look for any frayed, tangled, or kinked wires, especially around connectors. Damaged cables can prevent power or data transmission.
- Reboot Your System: The “golden rule” of IT troubleshooting. Unplug the camera (or the entire system if it’s an NVR/DVR) from power, wait 30 seconds, and plug it back in. This clears caches and recalibrates settings.
- Check Wi-Fi Signal Strength: Weak Wi-Fi can lead to poor video quality or dropped connections. Try moving your router closer or using a Wi-Fi extender.
- Verify Login Details: Double-check that your username and password for the camera app or system are correct.
Deeper Dives: Advanced Troubleshooting Steps
If the quick fixes don’t work, it’s time to dig a little deeper:
- Update Firmware and Software: Outdated firmware can cause compatibility issues and security vulnerabilities. Regularly check for and install updates for your camera and its companion app.
- Check Network Settings:
- IP Conflicts: If you have multiple devices, two might be trying to use the same IP address. You can use network tools (like ‘arp-a’ in Command Prompt) to identify and resolve these conflicts.
- Port Forwarding/DDNS: If you’re accessing an NVR/DVR directly, ensure your port forwarding rules are still active and your DDNS is updated, especially if your public IP address has changed.
- Clean the Lens: A dirty lens can cause blurry video. Gently clean it with a soft cloth.
- Review Feature Settings: Make sure features like motion detection, night vision, and recording schedules are enabled and configured as desired in the camera’s settings.
- Factory Reset: As a last resort, a factory reset will revert the camera to its original settings. While it means reconfiguring everything, it can often resolve persistent software glitches.
- Contact Support: If all else fails, reach out to your cloud VMS provider or the camera manufacturer’s technical support. They can provide model-specific guidance or recommend professional assistance.
“In my 15 years in the field, I’ve learned that consistency in power and network, coupled with regular firmware updates, are the unsung heroes of a stable remote security camera system. Don’t underestimate their power,” says John M. Sterling, a veteran security systems architect.
Frequently Asked Questions (FAQ)
What is a remote viewing camera?
A remote viewing camera is a surveillance device designed to allow users to access live video feeds and recorded footage from a distant location, typically through a connected device like a smartphone, tablet, or computer, provided there’s an internet connection.
Can I access my security camera remotely without Wi-Fi?
Yes, you can access a remote security camera without Wi-Fi by using alternative connectivity methods such as Ethernet cables (for wired IP cameras) or cellular networks (for 3G/4G cellular cameras). Cellular cameras are ideal for locations lacking Wi-Fi infrastructure.
How do remote security cameras get power?
Remote security cameras typically get power either through a direct wired connection to an AC outlet, Power over Ethernet (PoE) which delivers power and data through one Ethernet cable, or via rechargeable batteries, sometimes supplemented by solar panels for continuous charging.
What internet speed do I need for remote viewing?
A minimum upload speed of 5 Mbps is generally recommended for smooth remote viewing, especially for higher resolution cameras. Faster speeds ensure clearer footage and less lag.
Is remote monitoring secure?
Yes, remote monitoring systems employ security measures like encryption, password protection, and secure authentication protocols to protect your video feeds. It’s crucial to use strong, unique passwords and enable two-factor authentication to minimize the risk of unauthorized access.
What happens to recorded footage when remote monitoring is used?
Recorded footage from remote security cameras is typically stored either locally on a Network Video Recorder (NVR), Digital Video Recorder (DVR), or a memory card, or remotely in a cloud-based server. The retention period for footage can vary based on storage capacity and system settings.
How can I troubleshoot if my remote camera is offline?
Start by checking all power and network cable connections, rebooting the camera/system, and verifying your Wi-Fi or cellular signal strength. If the issue persists, update firmware, check for IP conflicts, or perform a factory reset. Contacting technical support is always an option.
The Future of Your Security, Today
Embracing remote security camera technology is about more than just installing a device; it’s about investing in peace of mind and staying connected to your property, no matter where life takes you. From understanding the intricate dance of network connectivity to selecting the perfect camera with features tailored to your needs, you’re now equipped with the knowledge to make informed decisions. Setting up your system effectively and knowing how to troubleshoot any issues ensures your digital guardians remain vigilant, providing invaluable protection.
Take control of your security narrative and experience the confidence that comes with always being in the know. Explore the possibilities, choose your ideal remote security camera solution, and step into a future where your property is always just a tap away.
Get our weekly buyer guide
Practical specs, not advice. Unsubscribe anytime.